Introduction
Creating a realistic bubble illustration in Inkscape is a great way to learn two of the software’s most powerful features: the Mesh Gradient tool and arc-based shine effects. In this tutorial, you will build a fully transparent-looking bubble from scratch using layered circles, mesh gradients, blur effects, and gradient arcs for the reflection. The technique works for single bubbles as well as full bubble scenes with multiple sizes and depths.
Screenshots in this tutorial were taken from an earlier version of Inkscape. The steps and interface are the same in the current version.
What You Will Learn
- How to use the Mesh Gradient tool to apply multi-color gradients to a circle
- How to layer circles with blur effects to create depth and a glassy look
- How to use the Ellipse Tool arc handles to draw partial arcs for shine effects
- How to apply and mirror linear gradients on stroke paths
- How to duplicate and arrange multiple bubbles for a full scene
- How to use blur to create a depth-of-field focus effect between bubbles
What You Need
- Software: Inkscape (version 1.0 or later recommended)
- Tools used: Mesh Tool, Ellipse Tool, Rectangle Tool, Node Tool, Selector Tool
- Skill level: Beginner to Intermediate
- Estimated time: 25–35 minutes
Document Setup
Before starting, set up your document:
- Open Inkscape and go to File > Document Properties (Ctrl + Shift + D)
- Set the document size to your preferred canvas size; an A4 format will work well for this illustration
- Make sure snapping is enabled (press % to toggle)
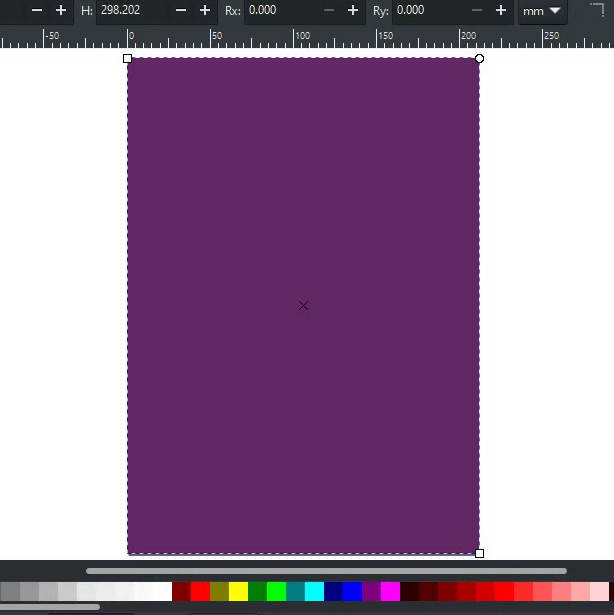
Step 1 — Set Up the Background
- Select the Rectangle Tool (R) and draw a rectangle the size of the document
- Open Object > Fill and Stroke (Shift + Ctrl + F) and set the fill to hex code #632A63
- Set the stroke to none
- Open the Layers & Objects panel and rename this rectangle “Background.”
- Lock the layer by clicking the lock icon next to it. This prevents you from accidentally selecting or moving it while working
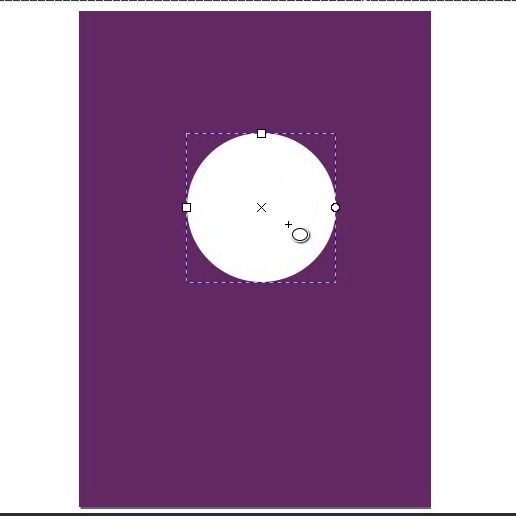
Step 2 — Draw the Base Circle
This is the main bubble shape that will hold the mesh gradient.
- Select the Ellipse Tool (E)
- Hold Ctrl and drag to draw a circle approximately 90 × 90 mm in the center of the canvas
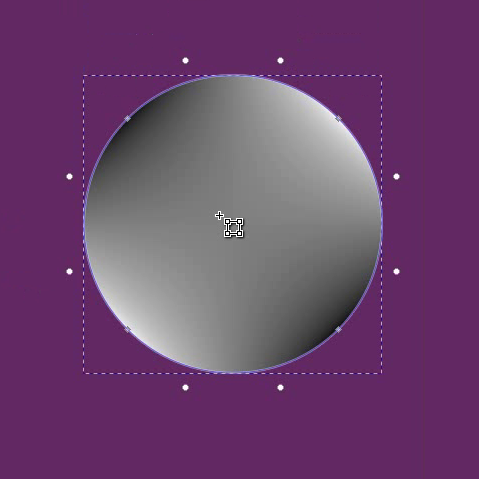
Step 3 — Apply the Mesh Gradient
The mesh gradient is what gives the bubble its multi-colored glassy appearance. Each corner node of the mesh gets a different color.
- With the circle selected, switch to the Mesh Tool (found in the left toolbar)
- In the tool controls bar at the top, set both Rows and Columns to 1
- Double-click on the circle to apply the mesh gradient; you will see a grid of nodes appear over the circle
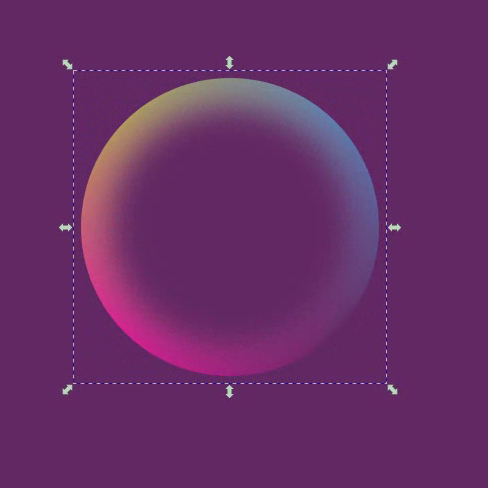
- Switch to the Node Tool (N) to color each node individually
- Select the top-left corner node and set its fill to #B4A458
- Select the top-right corner node and set its fill to #5E81B5
- Select the bottom-right corner node and set its fill to your purple background color, i.e., #632A63
- Select the bottom-left corner node and set its fill to #DE1E98
- With the circle still selected, go to Fill and Stroke and set the stroke to none

Tip: The exact colors you choose here affect the final bubble look. Colors that reflect your background color in the lower nodes and lighter or contrasting colors in the upper nodes create the most realistic glassy effect.
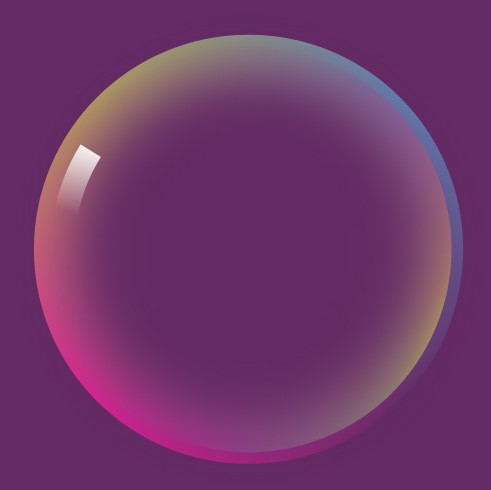
Step 4 — Add the Inner Blur Circle
This circle sits inside the mesh gradient circle and creates the soft glowing inner depth of the bubble.
- Switch to the Selector Tool (S), select the mesh gradient circle, and duplicate it (Ctrl + D)
- Change its fill to a solid color. Use the same hex code as your background color, i.e., #632A63
- Set stroke to none
- Resize this circle smaller by holding Ctrl + Shift while dragging a corner handle. Make it noticeably smaller so the mesh gradient circle remains visible around it like a thick colored border.
- With this inner circle still selected, go to the Fill and Stroke panel and set the blur to approximately 36% using the blur slider
Tip: The blur amount controls how soft the inner glow looks. A lower value (around 20–25%) gives a harder edge, while a higher value (40%+) creates a very soft, atmospheric effect. Adjust to taste.
Step 5 — Add the Rotated Mesh Overlay
This step adds a second, rotated mesh gradient circle on top to enhance the color complexity and realism of the bubble surface.
- Select the original mesh gradient circle again and duplicate it (Ctrl + D)
- Resize this duplicate to be smaller than the original mesh gradient circle, but larger than the blur circle. It sits as a middle layer
- Click the circle again to switch to rotation mode and rotate it approximately 157 degrees
- Switch to the Node Tool (N) to edit this circle’s mesh gradient nodes and reduce their opacity to make them semi-transparent:
- Select the top-left node and set its opacity to 0%
- Select the top-right node and set its opacity to 3.5%
- Select the bottom-left node and set its opacity to 7.5%
- Leave the bottom-right node as is
- This creates a very subtle secondary color shift on the bubble surface without overpowering the first mesh gradient
Step 6 — Group the Bubble Base
Before adding the shine effects, bring the blur circle to the correct position and group all the base layers.
- Select the blur circle using Alt + Click to select it from underneath other objects, or select it from the Layers & Objects panel
- Bring it to the top: press Home or go to Object > Raise to Top
- Select all three circles (mesh gradient circle, rotated overlay circle, and blur circle)
- Group them: Ctrl + G

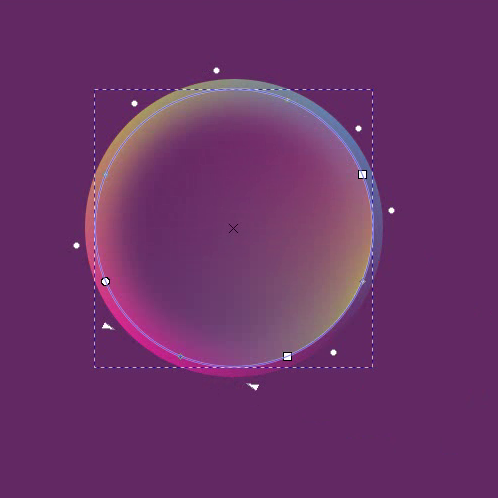
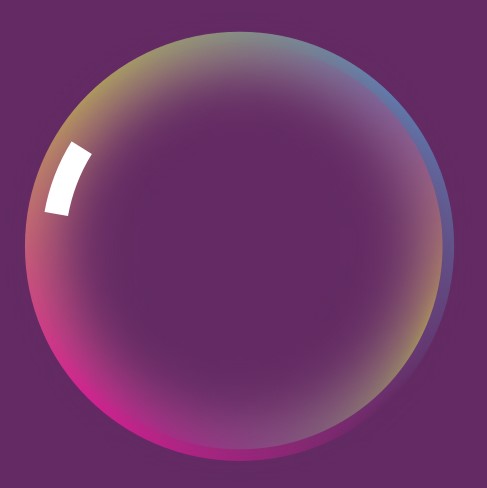
Step 7 — Create the First Shine Arc
The shine arcs are what make the bubble look truly realistic — they simulate the light reflection on a curved transparent surface.
- Select the Ellipse Tool (E) and draw a circle inside the bubble group. Size it to roughly two-thirds of the bubble diameter
- In Fill and Stroke:
- Set fill to none
- Set stroke to white
- Set stroke width to 5 mm
- Now convert the full circle into an arc using the arc handles on the ellipse:
- Set the Start angle to 190°
- Set the End angle to 212°
- This gives you a short curved arc rather than a full circle
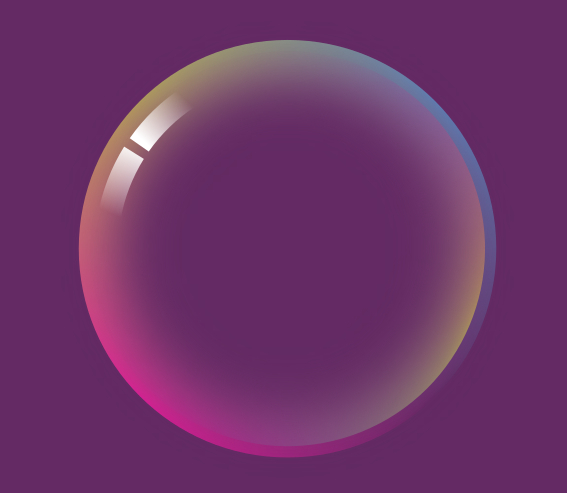
- Go to the Stroke Paint tab in the Fill and Stroke panel and click Linear Gradient to apply a gradient to the stroke
- Switch to the Node Tool (N) and adjust the linear gradient handles on the arc so that:
- One end of the arc is fully white (opacity 100%)
- The other end fades out gradually to transparent (opacity 0%)
Tip: Drag the gradient handles along the arc path to control exactly where the fade starts and ends. A fade that starts strong and disappears quickly looks more natural than a long slow fade.
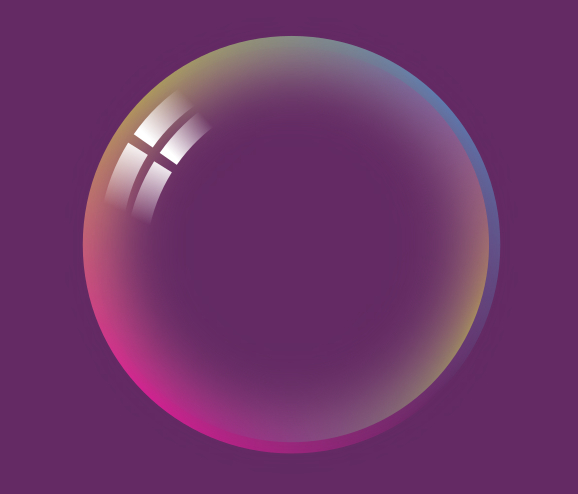
Step 8 — Create the Second Arc
A second slightly separated arc next to the first one makes the reflection look more natural and dimensional.
- Switch to the Selector Tool (S) and duplicate the first arc (Ctrl + D)
- Switch to the Ellipse Tool (E) and adjust the Start and End angle values of the duplicate so it appears just next to the first arc with a small space between them
- Switch to the Node Tool (N) and adjust the linear gradient on this arc so it is mirrored in direction compared to the first, where the first arc fades left to right, this one fades right to left
- Switch to the Selector Tool, select both arcs, and group them (Ctrl + G)
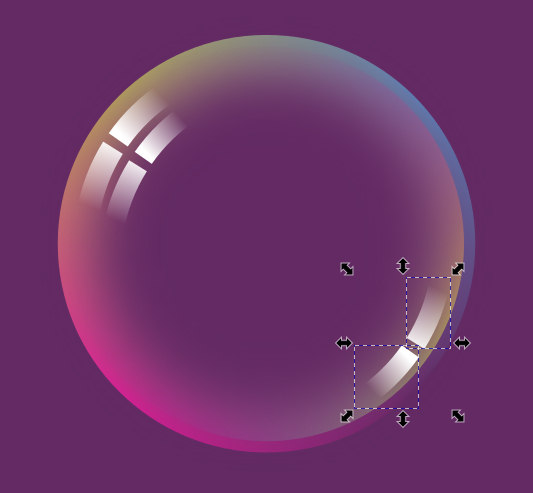
Step 9 — Create the Lower Reflection Group
A second smaller reflection group near the center of the bubble adds depth and makes the bubble look three-dimensional.
- With the arc group selected, duplicate it (Ctrl + D)
- Place the duplicate below and closer to the center of the bubble
- Double-click to enter the group. Select both arcs individually and reduce the stroke width to 4.5 mm to make this reflection slightly thinner than the upper one
- Double-click anywhere on the canvas outside the group to exit it
- Select the lower arc group again and duplicate it (Ctrl + D)
- Flip it horizontally (H) and then vertically (V)
- Place it on the opposite side of the bubble facing the first lower reflection; these two together create a symmetric lower shine effect
Step 10 — Complete the Bubble Scene
The bubble is complete. Now build it into a full scene.
- Select everything, the bubble base group and all arc groups, and group them all (Ctrl + G)
- Your single bubble is complete and ready to duplicate
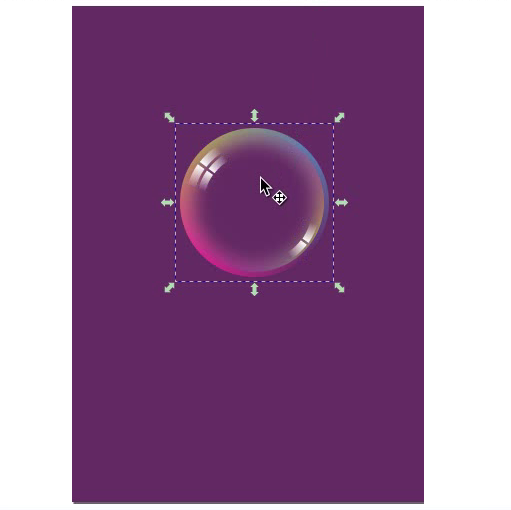
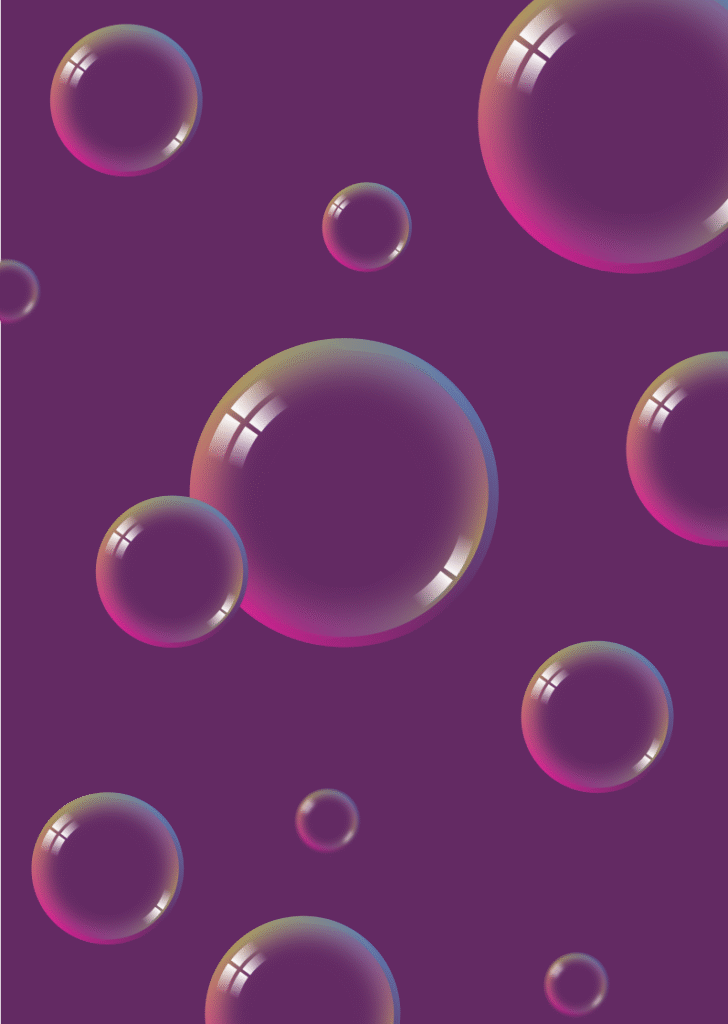
- To create multiple bubbles, hold Spacebar while dragging the bubble to stamp copies at different positions
- Resize each copy individually by holding Ctrl + Shift while dragging, and vary the sizes to create a natural, scattered bubble effect
- For bubbles in the background, select them and add a small blur using the blur slider in Fill and Stroke. This simulates a depth-of-field focus effect where background bubbles appear slightly out of focus
Customization Ideas
Once you have your bubble, here are ways to customize it:
- Change the color scheme — edit the mesh gradient node colors in Step 3 to match any palette. Warm tones (yellow, orange, pink) on a dark background create a sunset bubble; cool tones (blue, teal, white) on dark navy create a night sky feel
- Adjust bubble transparency — reduce the overall group opacity in the Fill and Stroke panel to make bubbles more transparent
- Add a background scene — place a gradient or photo behind the locked background rectangle, and the bubbles will look like they are floating in that environment.
- Vary the shine arc angles — experiment with different start and end angle values in Steps 7 and 8 to change where the light reflection appears on the bubble surface
- Create a bubble cluster — group several bubbles close together and partially overlapping for a cluster or foam effect
Keyboard Shortcuts Used
| Action | Shortcut (Windows) | Shortcut (Mac) |
|---|---|---|
| Zoom in | + | + |
| Zoom out | – | – |
| Duplicate | Ctrl + D | Cmd + D |
| Raise to Top | Home | Home |
| Group | Ctrl + G | Cmd + G |
| Flip Horizontal | H | H |
| Flip Vertical | V | V |
| Zoom to Fit Page | 5 | 5 |
| Fill & Stroke Panel | Ctrl + Shift + F | Cmd + Shift + F |
Panels Used
| Panel | Shortcut (Windows) | Shortcut (Mac) |
|---|---|---|
| Layers & Objects | Ctrl + Shift + L | Cmd + Shift + L |
| Fill & Stroke | Ctrl + Shift + F | Cmd + Shift + F |
| Align & Distribute | Ctrl + Shift + A | Cmd + Shift + A |
FAQs
Final Thoughts
The bubble illustration is one of the best exercises for learning the Mesh Gradient tool because it shows you how layered gradients, opacity, and blur work together to create realistic surface effects. Once you are comfortable with this technique, you can apply the same approach to glass objects, water droplets, spheres, and any other transparent or reflective surface in Inkscape.