Introduction
Vector character illustration does not have to be complicated. In this tutorial, you will learn how to create a cute owl illustration in Inkscape using nothing but basic shapes like circles, ellipses, and a triangle. No drawing tablet or freehand sketching required. You will build the owl piece by piece: eyes first, then the beak, body, feet, and wings, all from simple geometric shapes combined with color fills and Inkscape’s Path Effects for smooth, rounded corners.
Screenshots in this tutorial were taken from an earlier version of Inkscape. The steps and interface are the same in the current version.
What You Will Learn
- How to build a character illustration entirely from basic geometric shapes
- How to layer and resize circles to create eye depth and border effects
- How to use the Ellipse Tool arc handles to create crescent and eyebrow shapes
- How to apply Path Effects > Corners to round a triangle into a smooth beak
- How to use duplicate, flip, and mirror techniques for symmetric character parts
- How to assemble and align all parts into a finished, centered illustration
What You Need
- Software: Inkscape (version 1.0 or later recommended)
- Tools used: Ellipse Tool, Selector Tool, Polygon/Star Tool, Node Tool
- Skill level: Beginner
- Estimated time: 20–30 minutes
Document Setup
Before starting, set up your document:
- Open Inkscape and go to File > Document Properties (Ctrl + Shift + D)
- Set the document to your preferred canvas size; 150 × 150 mm works well
- Make sure snapping is enabled (press % to toggle)
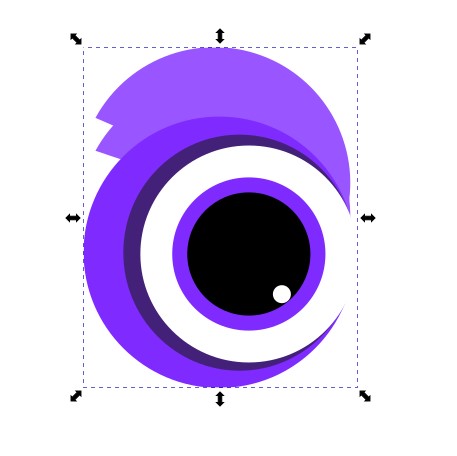
Step 1 — Build the Eye Base
The owl’s eye is made from several layered circles, each a different size and color. You will build one complete eye first, then mirror it for the second.
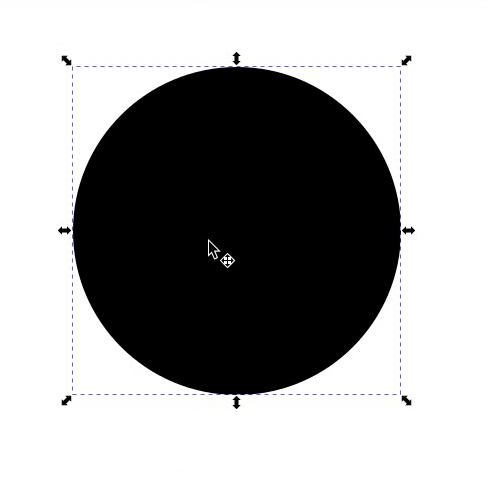
- Select the Ellipse Tool (E)
- Hold Ctrl and drag to draw a circle. This is the main black pupil of the eye
- Open Object > Fill and Stroke (Ctrl + Shift + F) and set fill to black (#000000). Set stroke to none
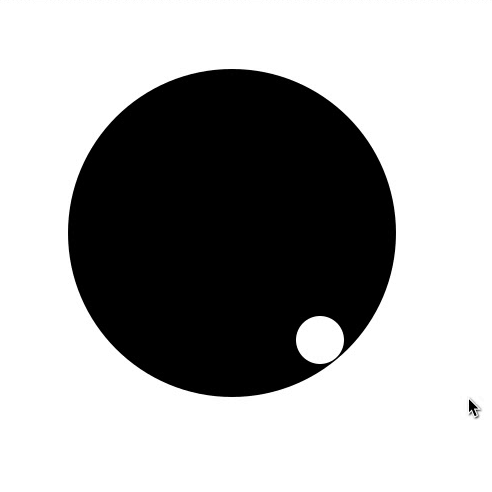
- Switch to the Selector Tool (S) and duplicate the black circle (Ctrl + D)
- Change the duplicate’s fill to white (#FFFFFF)
- Resize it smaller by holding Ctrl while dragging a corner handle
- Position this small white circle at the lower-right curve of the black circle, this creates the sparkle or catchlight of the eye
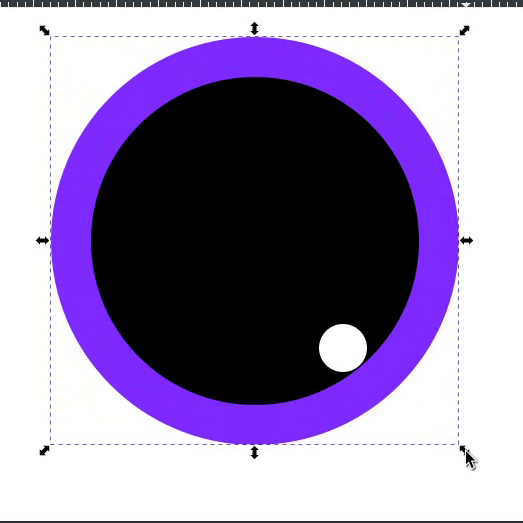
Step 2 — Add the Eye Border and Glow Layers
These additional circles create the colored border, glow, and depth around the eye.
- Select the black circle and duplicate it (Ctrl + D)
- Change the fill to #7F2AFF (bright purple)
- Send it to the bottom: press End
- Resize it larger by holding Ctrl + Shift while dragging a corner handle until it forms a thick visible border around the black circle
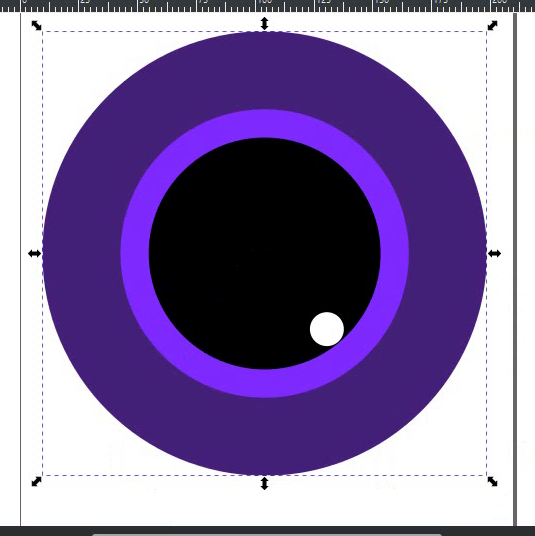
- Select the purple border circle and duplicate it (Ctrl + D)
- Resize it larger still. This will be the outermost glow layer. Hold Ctrl + Shift while dragging to make it significantly larger than the purple border circle
- Send it to the bottom: press End
- Change its fill to #442178 (dark purple)
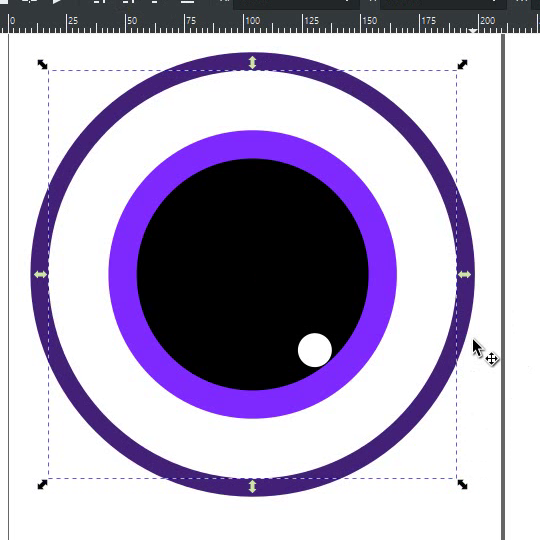
- Select the dark purple outer circle and duplicate it (Ctrl + D)
- Change its fill to white (#FFFFFF)
- Press End to send it to the bottom, then press Page Up once to bring it one step up. It should now sit just above the bottom-most dark purple circle
- Resize it smaller than the dark purple circle but larger than the bright purple border circle. This white ring creates a subtle highlight between the outer glow and the border
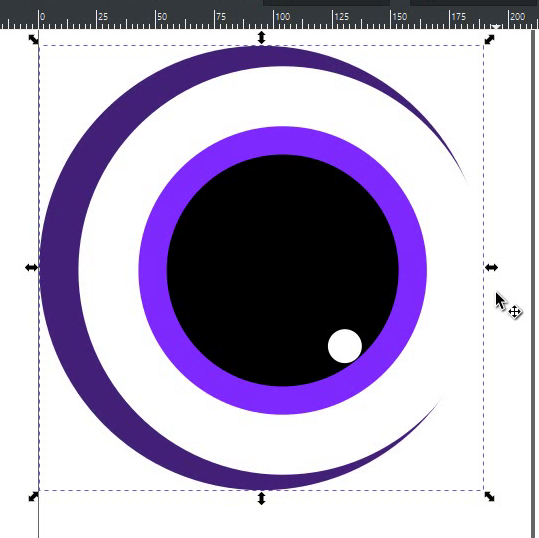
Step 3 — Add the Eye Crescent and Brow
This step adds the dark crescent shadow at the bottom of the eye and the eyebrow arc above it.
- Select the bottom-most dark purple circle. Do not resize it yet
- Keep the fill as #442178 and move this to the left using the arrow keys or by dragging. Keep moving it until its right side disappears behind the other circles, leaving only a crescent-shaped portion visible on the left side of the eye
- Select this crescent circle and duplicate it (Ctrl + D)
- Change its fill to #7F2AFF
- Resize it by holding Ctrl. Drag from the top-left corner and bottom-left corner to make it significantly larger than the dark purple crescent-shape
- Duplicate this again (Ctrl + D)
- Change fill to #9955FF (lighter purple)
- Move it upward to position it above the eye as the eyebrow base
- Switch to the Ellipse Tool (E) and convert this circle to a semicircle arc to create the eyebrow curve:
- Set Start angle to 208°
- Set End angle to 0°
- Switch back to the Selector Tool (S) and adjust its position above the eye until it looks like a natural eyebrow shape
- Duplicate the eyebrow arc (Ctrl + D) and move the copy slightly upward to create a second layered eyebrow line
- Send this duplicate to the bottom (End) so it sits behind the first eyebrow arc. This adds thickness and depth to the brow
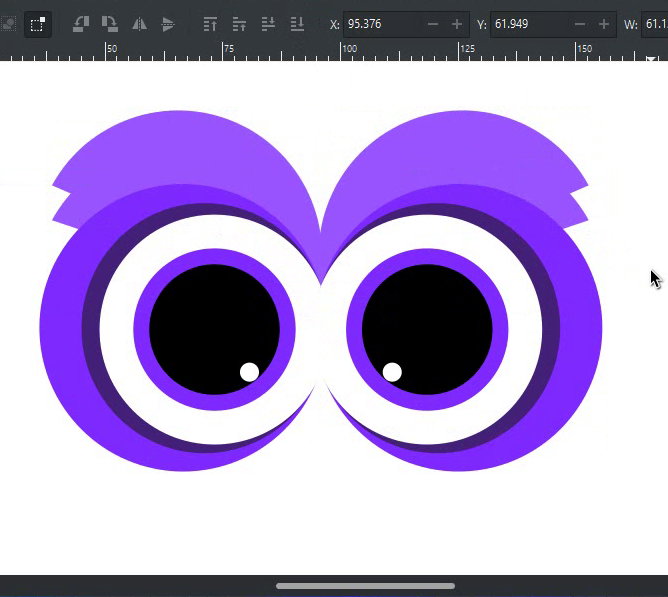
Step 4 — Complete and Duplicate the Eye
- One eye is now complete. Review the layers and make sure everything is positioned correctly
- Select all elements that make up the eye
- Group them: Ctrl + G
- Duplicate the eye group (Ctrl + D)
- Flip the duplicate horizontally: press H
- Drag the flipped copy to the right and position it to form the second eye. Adjust spacing until both eyes look balanced and symmetrical
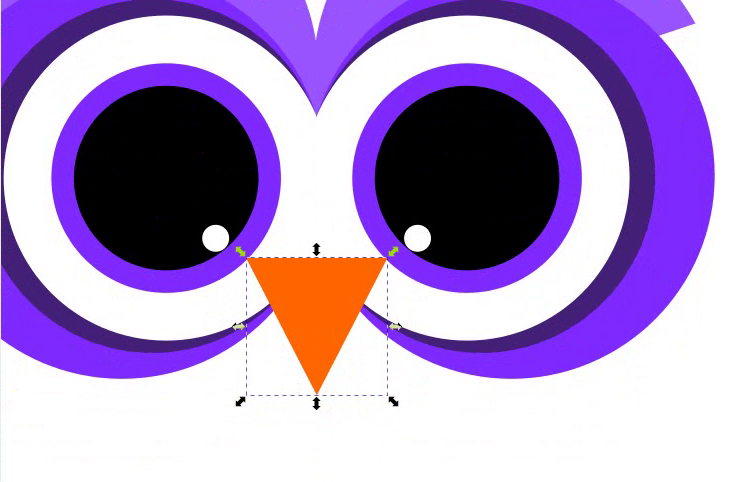
Step 5 — Create the Beak
The beak is a triangle with rounded corners created using Inkscape’s Path Effects.
- Select the Polygon/Star Tool from the toolbar
- In the tool controls bar at the top, make sure it is set to Polygon mode (not Star mode) and set Corners to three
- Draw a triangle on the canvas
- Switch to the Selector Tool (S) and rotate the triangle 180° so it points downward
- Set fill to #FF6600 (orange). Set stroke to none
- Resize and position the triangle between the two eyes to form the beak. Adjust width and height until the proportions look natural
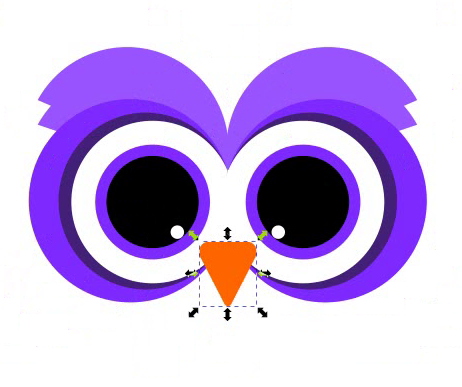
- Now round the corners of the beak: go to Path > Path Effects (Ctrl + &)
- Click the + button to add a new effect and select Corners (Fillet/Chamfer)
- Select all 3 corner nodes in the Path Effects dialog and increase the rounding value slightly. A small amount gives a natural smooth beak without losing the triangular shape
- Switch to the Selector Tool and fine-tune the beak position between the eyes
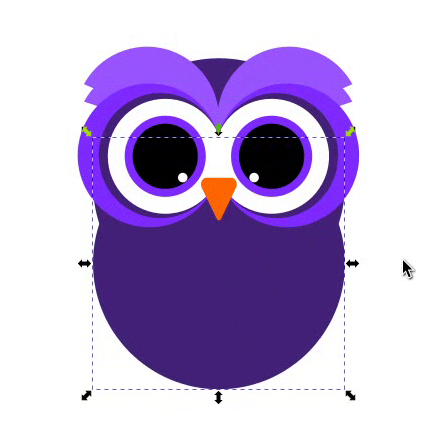
Step 6 — Build the Owl Body
The owl’s body is a large circle that sits behind the eyes and beak.
- Select the Ellipse Tool (E)
- Hold Ctrl and draw a large circle enough to sit behind and encompass both eyes. This is the main body shape
- Set fill to #442178 (dark purple). Set stroke to none
- Send it to the bottom: press End
- Switch to the Selector Tool and position it so the eyes sit naturally on the upper portion of the body circle, as if the owl is looking straight ahead

- Duplicate the body circle (Ctrl + D) and send it to the bottom (End)
- Move it downward so it extends below the main body circle. This second circle forms the lower body and gives the owl a rounder, fuller silhouette
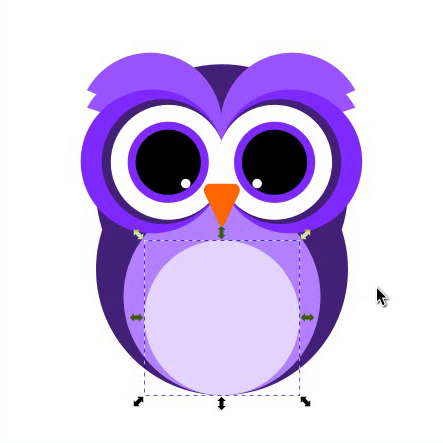
Step 7 — Add the Body Detail Circles
These circles add the layered chest detail that gives the owl its characteristic look.
- Select the main body circle and duplicate it (Ctrl + D)
- Send the duplicate behind everything but above the lower body circle
- Resize it from the top center edge while holding Ctrl. Drag inward to make it shorter from the top, creating a slightly smaller circle that sits centered on the body
- Set fill to #B380FF (medium blue-purple)
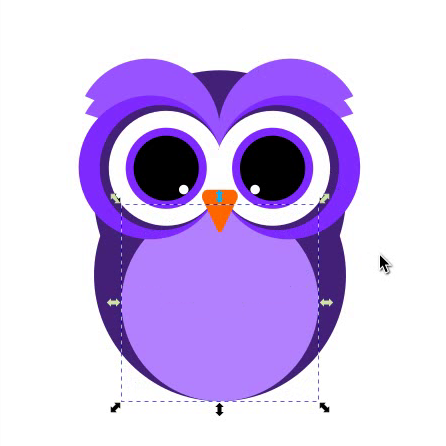
- Duplicate this circle (Ctrl + D)
- Resize it vertically from the top center handle to make it slightly shorter.
- Position it behind the rest but above the previous detail circle
- Set fill to #E5D5FF (very light lavender)
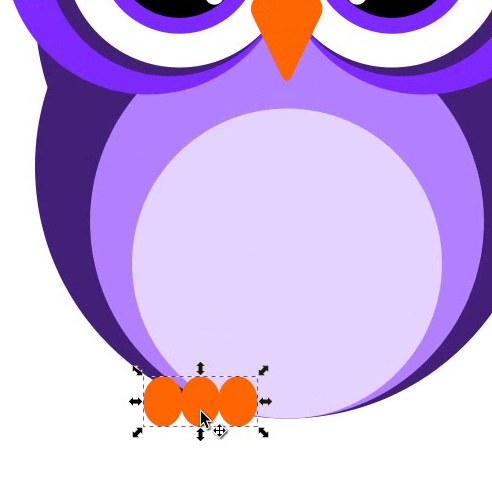
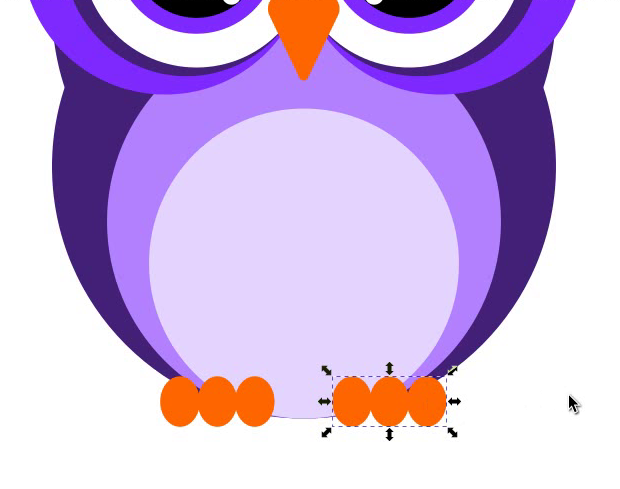
Step 8 — Create the Feet
The owl’s feet are made from small orange ellipses arranged in rows.
- Select the Ellipse Tool (E)
- Draw a small ellipse at the bottom-left side of the body
- Set fill to #FF6600 (orange). Set stroke to none
- Switch to the Selector Tool and duplicate the ellipse (Ctrl + D)
- Place the duplicate just to the right of the first ellipse
- Duplicate again (Ctrl + D) and place it to the right of the second. You now have 3 small orange ellipses in a row, forming one foot
- Select all 3 ellipses and group them (Ctrl + G)
- Duplicate the foot group (Ctrl + D)
- Place the duplicate on the right side of the body to form the second foot, mirroring the position of the first
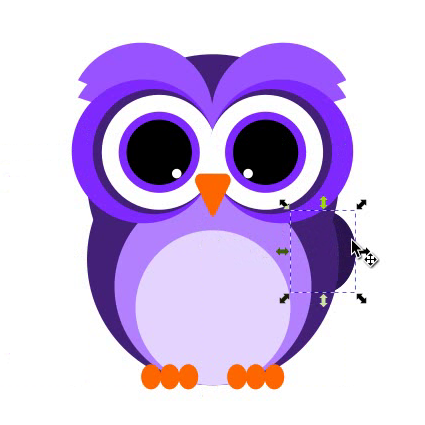
Step 9 — Add the Wings
The wings are ellipses placed on either side of the body and sent behind it so they appear to extend from behind the owl.
- Select the Ellipse Tool (E)
- Draw an ellipse on the right side of the body. Size and angle it to look like a wing extending outward and slightly downward
- Set fill to #2D1650 (very dark purple). Set stroke to none
- Send it to the bottom: press End
- Switch to the Selector Tool and adjust its position. Slide it behind the body so it peeks out from the right side naturally
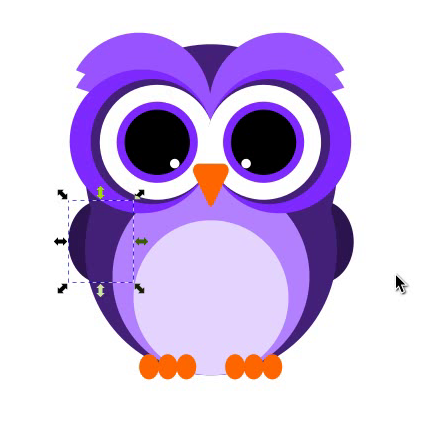
- Duplicate the wing (Ctrl + D)
- Send the duplicate to the bottom (End)
- Flip it horizontally (H) and position it on the left side of the body to mirror the right wing symmetrically
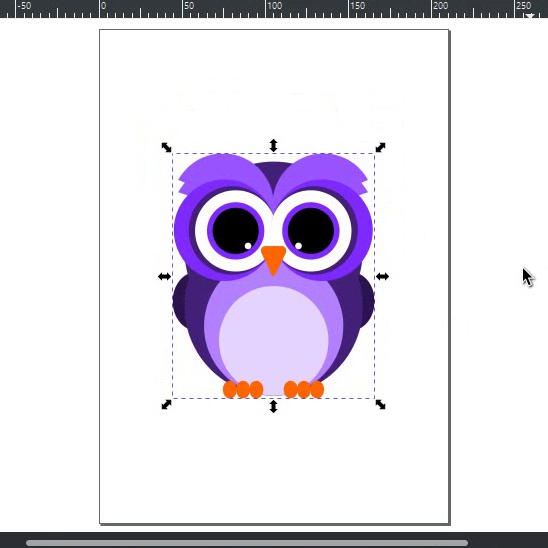
Step 10 — Final Assembly
- Select all elements on the canvas (Ctrl + A)
- Group them: Ctrl + G
- Open Object > Align and Distribute (Shift + Ctrl + A)
- Set “Relative to” to Page
- Click the Center on vertical axis and Center on horizontal axis to place the owl perfectly in the center of the document
- Your owl illustration is complete
Customization Ideas
Once you have the basic owl, here are ways to make it your own:
- Change the color palette — swap the purple tones for earth tones (brown, tan, cream) for a more natural owl look, or use greens and teals for a forest owl feel
- Add a branch — draw a horizontal rectangle below the feet and send it to the bottom to place your owl perched on a branch
- Add a background — draw a rectangle behind everything and fill it with a night sky gradient (dark blue to black) with small white dots as stars
- Scale the eye details — make the pupils larger relative to the eye for a more cartoon look, or smaller for a more realistic owl expression
- Add feather texture — duplicate the body circle and use Path Effects to add a rough or zigzag edge for a feathered outline effect
- Change the beak shape — adjust the corner rounding in Path Effects to make the beak more hooked (less rounding) or more blunt (more rounding)
Keyboard Shortcuts Used
| Action | Shortcut (Windows) | Shortcut (Mac) |
|---|---|---|
| Zoom in | + | + |
| Zoom out | – | – |
| Duplicate | Ctrl + D | Cmd + D |
| Select All | Ctrl + A | Cmd + A |
| Group | Ctrl + G | Cmd + G |
| Flip Horizontal | H | H |
| Path Effects | Ctrl + & | Cmd + & |
| Zoom to Fit Page | 5 | 5 |
Panels Used
| Panel | Shortcut (Windows) | Shortcut (Mac) |
|---|---|---|
| Layers & Objects | Ctrl + Shift + L | Cmd + Shift + L |
| Fill & Stroke | Ctrl + Shift + F | Cmd + Shift + F |
| Align & Distribute | Ctrl + Shift + A | Cmd + Shift + A |
FAQs
Final Thoughts
This owl illustration is proof that you can create expressive, detailed vector characters in Inkscape using only basic shapes. The key skills you practised here: layering circles for depth, using arc handles for curved shapes, applying Path Effects for smooth edges, and mirroring elements for symmetry, are techniques you will use in almost every illustration project going forward.