Introduction
Paths in Inkscape are one of the most important concepts to understand. Almost everything you draw eventually becomes a path, especially when you want more control over shapes and designs. In this article, you’ll learn what paths are, how they work, and how to edit them using nodes and handles in a simple, beginner-friendly way.
Types of Paths
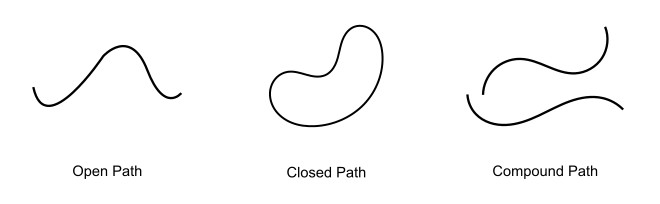
In Inkscape, paths are generally divided into three types:
Open Path
An open path has two endpoints.
Closed Path
A closed path has no endpoints because it forms a complete loop.
Compound Path
A compound path is a combination of multiple paths, which can include open paths, closed paths, or both, treated as a single object.
Shapes vs Paths
Paths are different from shapes because they do not have a predefined structure. In the example below, both objects look like rectangles, but they behave differently. The first one is a rectangular shape, while the second one is a rectangular path.

When you double-click a shape, you will see shape handles. The shape is still defined by properties such as width and height. Dragging any corner handle resizes the entire shape uniformly, not individual points
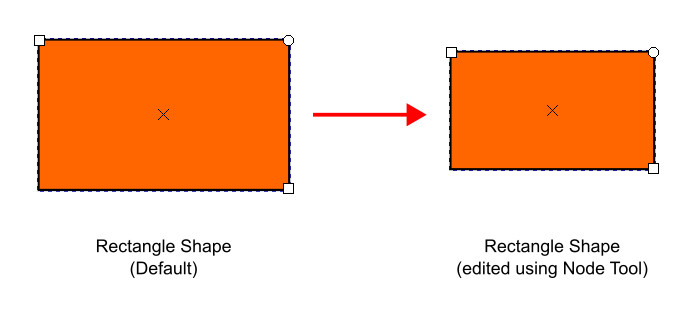
On the other hand, when you double-click a rectangular path, four diamond-shaped nodes appear at the corners. Each node can be moved independently. You can also change the behavior of these nodes using the Node Tool. This is the key difference between a shape and a path.

Converting Shapes to Paths
You can easily convert a shape into a path. Select the shape, then go to Path > Object to Path or use the shortcut Ctrl + Shift + C.
Remember that this process is not reversible. Once a shape is converted into a path, it cannot be converted back into a shape.
Nodes and Handles of Path
In Inkscape, paths consist of nodes and control handles. In a simple curve like in the figure below, two diamond-shaped points at each end are its nodes. The other two circular points are control handles for each node.
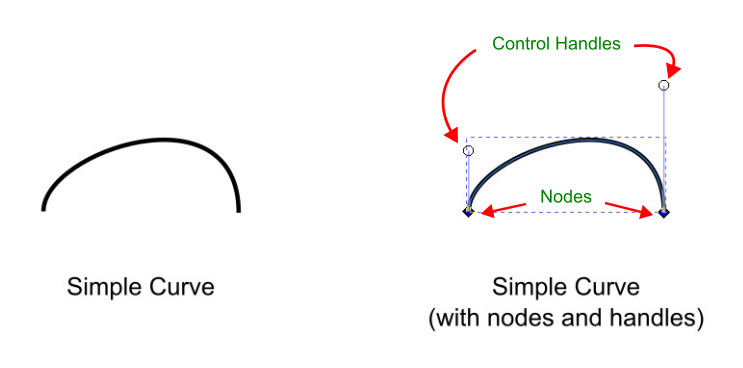
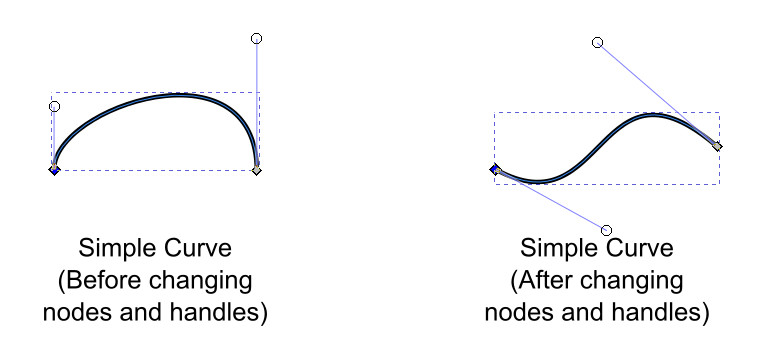
When you select a node using the Node Tool, its handles become visible. Dragging these handles changes the curve’s shape, while dragging the node moves the point itself.
Types of Nodes
In Inkscape, there are four types of nodes:
- Corner
- Smooth
- Symmetric
- Auto-Smooth
You change node types with the Node Tool.
Corner (Cusp) Node
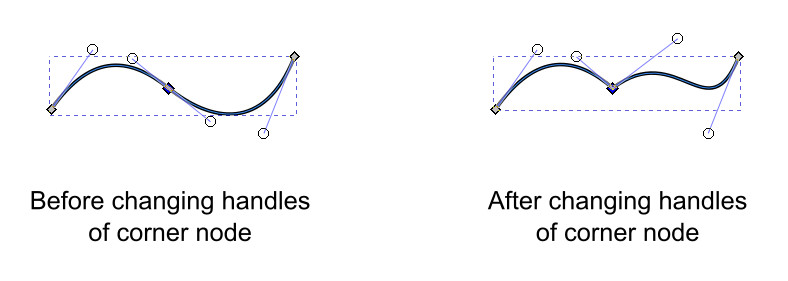
The diamond-shaped node is called a corner node.
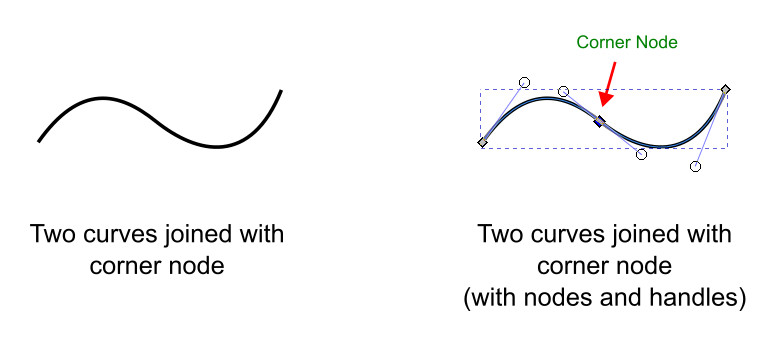
The handles of a corner node work independently. One handle adjusts one segment, while the other adjusts the adjacent segment without disturbing the other. This node type is used when you want sharp or abrupt corners in a path.
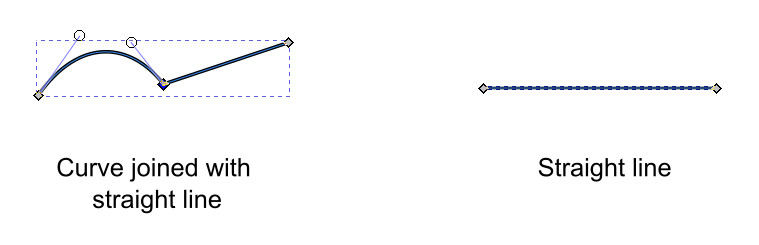
The segment between two nodes can also be a straight line. A straight line has two corner nodes but with no handles, since it is not a curve.
Smooth Node
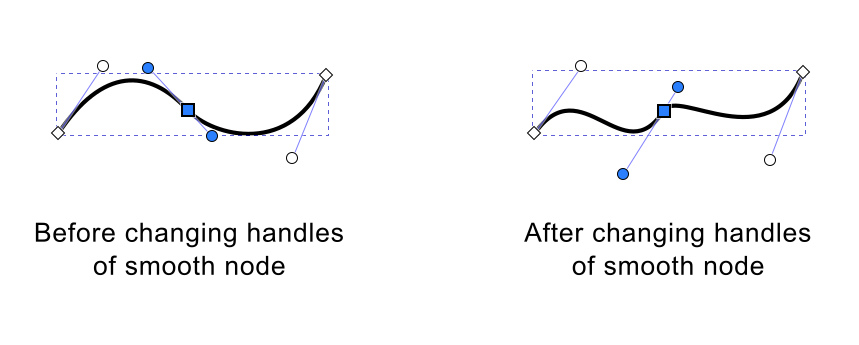
The square-shaped node is called a smooth node.
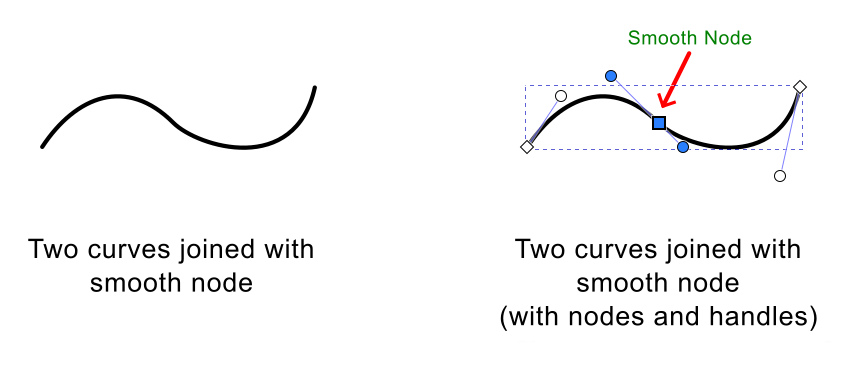
Both handles work together to keep the path smooth on both sides of the node. However, the length of both handles can differ, so the curve is smooth but not necessarily symmetrical.
Symmetric Node
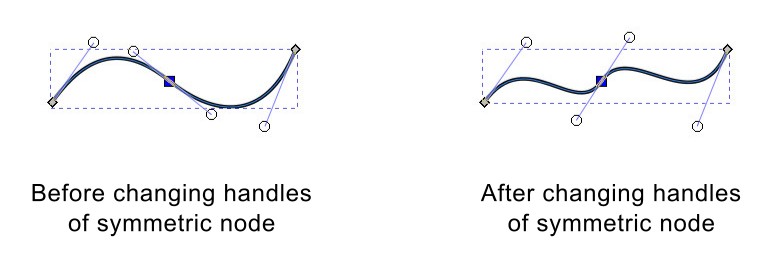
A symmetric node is also square-shaped, but both handles are equal in length.
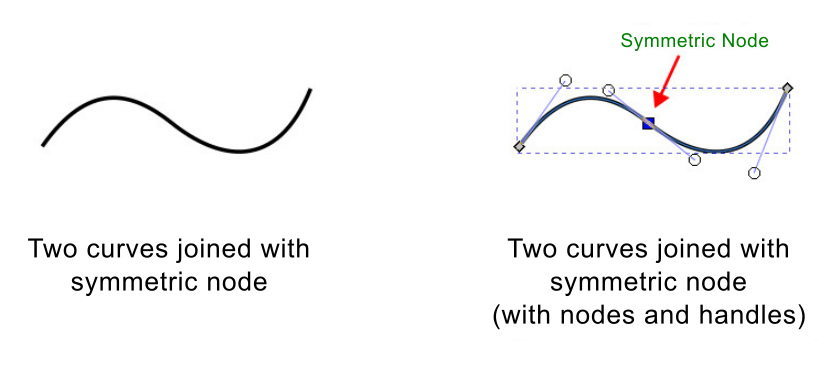
Because the handles move together and stay equal, the curve on both sides of the node remains perfectly symmetrical.
Auto-smooth Node
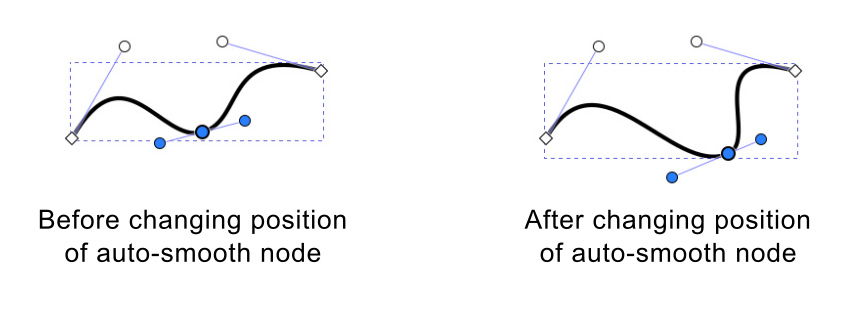
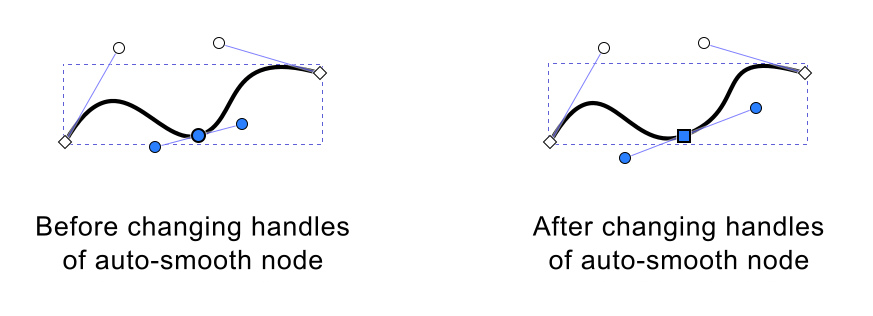
The circle-shaped node is called an auto-smooth node.
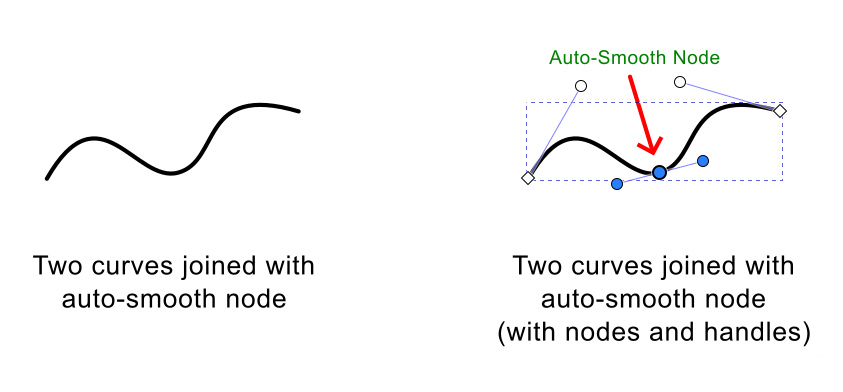
This node automatically adjusts its handles to keep the curve smooth when you move the node or nearby nodes.
If you manually edit its handles, it converts into a regular smooth node. To keep the automatic behavior, avoid adjusting the handles manually.
How to Change Node Types
You can change node types using the Node Tool Control Bar or using the following keyboard shortcuts:
- Shift + C → Corner (Cusp)
- Shift + S → Smooth
- Shift + A → Auto-Smooth
- Shift + Y → Symmetric
You can also Ctrl+click on a node to cycle through the node type in this order:
Corner → Smooth → Auto-Smooth → Symmetric → Corner
Tools for Creating Paths in Inkscape
Inkscape provides three main tools for creating paths:
- Pencil Tool – Used for freehand drawing
- Pen Tool – Used for precise straight and curved paths
- Calligraphy Tool – Used to draw calligraphic and brush-style strokes
FAQs
Tools Used
Final Thoughts
Understanding paths will make your work in Inkscape much more flexible and precise. Once you get comfortable editing nodes and converting shapes to paths, you’ll be able to create and refine almost any design with confidence. Take some time to practice, and paths will quickly start to feel natural.