Introduction
The Star/Polygon Tool in Inkscape is the most interesting and exciting shape tool. It is used for creating not only just stars and polygons but its different options allow it to create many different and cool shapes just in seconds. You can quickly access it by using shortcut key * (asterisk), or by clicking the star/polygon icon in the toolbar.
This tool is perfect for making logos, icons, badges, decorative elements, and symmetrical designs. It offers easy customization through its Tool Controls bar, where you can adjust the number of corners, rounding, randomness, and spoke ratio. Whether you’re drawing a perfect polygon or experimenting with star effects, this tool provides endless creative possibilities with just a few clicks or drags.
Transform & Scaling Techniques
Using the Selector Tool
The Selector Tool is the main tool for transforming rectangles or any object in Inkscape including scaling, moving, rotating, and skewing. You can switch to the Selector Tool by pressing the Spacebar, and press it again to return to the Star/Polygon Tool.
If the Selector Tool is already active, double-clicking on a rectangle will also reopen the Star/Polygon Tool.
Using Transform Panel
The Transform Panel in Inkscape provides precise control for moving, scaling, rotating, and skewing objects using exact numerical values. It’s ideal when you need consistent measurements or want to apply the same transformation to multiple objects.
You can open the panel by going to Object › Transform or by pressing Ctrl+Shift+M. Each tab in the panel lets you perform a specific action: Move, Scale, Rotate, Skew, or Transform by Matrix, by entering exact numbers instead of dragging handles manually.
This method is especially helpful for designers who prefer accuracy and want to make subtle adjustments without relying on mouse movements. When working with polygons and stars, it allows you to resize, rotate, or position them precisely for creating clean and symmetrical designs.
Shape Selection

The first two options in the Tool Controls bar let you choose the type of shape you want to draw, either a polygon or a star. Once you select a shape, the remaining options in the bar adjust automatically based on your choice.
Polygon Shape
Handles of Polygon
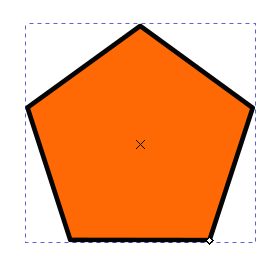
Left-click and drag draw a five-corner polygon. When the polygon is created, a diamond-shaped handle appears at one of the corners of a polygon. This handle is used for multiple purposes. Left-click, hold, and drag will change the size of the polygon. Dragging inward makes the shape smaller, and dragging outward enlarges it. Moving the cursor in a circular motion rotates the polygon. To resize the polygon without rotating it, hold the Ctrl key while dragging; this locks the rotation and maintains the original corner alignment.
Polygon Tool Control Bar
Corners
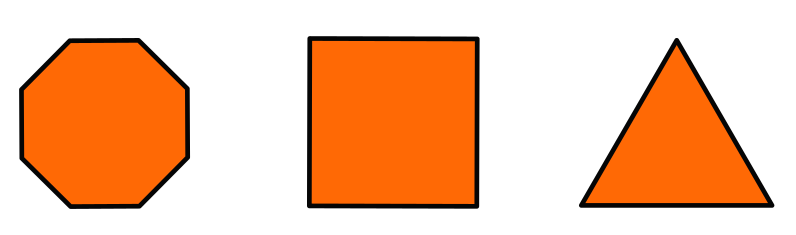
By default, the Polygon Tool creates a polygon with five corners. You can easily change this number using the Corners option. For example, set it to 6 to create a hexagon, 4 for a square, or 3 for a triangle. You can increase the number of corners as much as you like (max 1024) to make complex geometric shapes.
Rounded
The Rounded option is used to smooth or curve the corners of a polygon. Its value ranges from -10.000 to 10.000, where 0 keeps the corners sharp. Increasing or decreasing the value adds a rounded effect to the edges, giving the shape a softer look.
Randomized
The Randomized option randomly shifts the corners and angles of the polygon, creating a more irregular or organic shape. Its value range is also -10.000 to 10.000, and setting it to 0 restores the polygon to its original form.
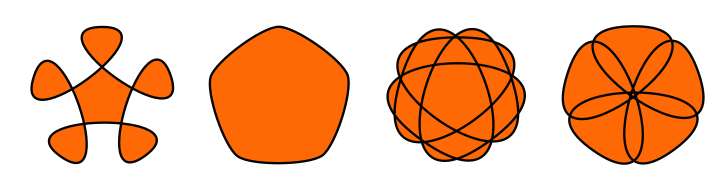
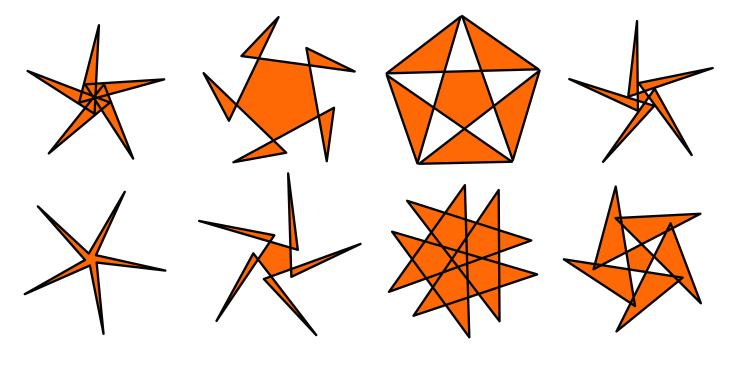
Below are some examples you can create using the Polygon Tool. Try experimenting with these settings yourself, or check out our Vector Art Examples Using the Star/Polygon Tool tutorial.
Star Shape
Handles of Star
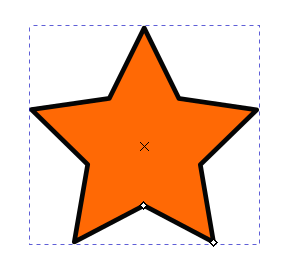
Left-Click and drag will draw the classic star with five corners. When a star is created, two diamond-shaped handles appear at the corners of a star. The outer handle adjusts the tip radius, and the inner handle controls the base radius.
Dragging handles while holding the Ctrl key will shrink or enlarge the star only. Ctrl restricts the twisting and rotating of the star. Without holding Ctrl, the star may twist as you drag, making it harder to maintain a symmetrical shape.
Star Tool Control Bar

Corners
By default, the star has five corners, but you can easily change this number in the Corners option. The value can range from 2 to 1024, allowing you to create anything from simple shapes to complex star patterns.
Spoke Ratio
The Spoke Ratio controls the distance between the base radius and tip radius of the star, in other words, how “deep” the points are. The Spoke ratio option is used to perform the same task of shrinking and enlarging the shape without twisting and rotating the star. The default value is 0.500, and it can range from 0.010 to 1.000.
Rounded
The Rounded option smooths the corners of the star. Its value ranges from -10.000 to 10.000, with 0 giving sharp edges. You can also adjust rounding manually by holding the Shift key while dragging the handles.
Randomized
The Randomized option randomly scatters the star’s corners and angles, creating fun, irregular shapes. Its value also ranges from -10.000 to 10.000, and setting it to 0 restores the original star. You can also randomize the shape by holding the Alt key while dragging the handles.
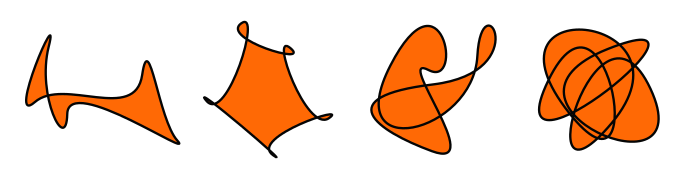
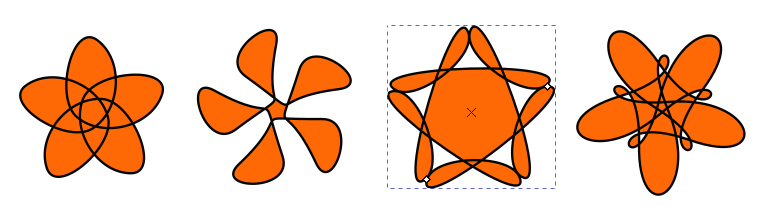
Below are some examples you can create using the Star Tool. Try experimenting with these settings yourself, or watch our Vector Art Examples Using the Star/Polygon Tool tutorial.
Restore Default Shape again
To restore the default settings of the star/polygon shape, click on the Reset Shape Parameters to the Default button, the right-most button in the Tool Control bar.
FAQs
Final Thoughts
The Star/Polygon Tool is an excellent way to create both precise geometric shapes and artistic variations. You can freely adjust corners, roundness, and randomness to explore different styles and effects. The Transform panel and Selector Tool make it easy to resize, rotate, or align your shapes accurately. Once you get familiar with the controls and handle adjustments, you’ll be able to design a wide range of shapes. It’s a fun and powerful tool for adding variety and detail to your vector artwork in Inkscape.